

You’ve already spent hours researching, writing, and publishing a blog post. But what if that same content could help you reach a new audience on YouTube—without recording yourself on camera or learning complicated video-editing software?
You don’t necessarily need to create every video from scratch. A well-written article can provide the foundation for a short, engaging video when you focus on one useful idea and present it in a visual format.
That’s where AI video tools can help.
Depending on the tool, you can turn written content into a video script, generate narration, add relevant visuals, and create vertical videos for YouTube Shorts. However, AI-generated videos still need human review. A tool may select an irrelevant image, mispronounce a technical term, or produce a script that sounds too generic.
In this guide, we’ll look at five AI tools that can help you repurpose blog content into short videos. You’ll learn what each tool is suited for, how its free option works, and what to check before investing in a paid plan.
Quick answer: Start with Faceless.so if you want a dedicated faceless-video workflow, explore Revid.ai for AI-generated short-form videos, or try InVideo AI for broader video creation. Lumen5 is worth considering for scene-based article videos, while Fliki is a useful option when AI narration is important. The best choice depends on your input format, editing needs, and free-plan restrictions.
Quick Comparison: 5 AI Tools for Turning Blog Posts Into YouTube Shorts
| AI tool | Best for | Free starting point | Main limitation to check |
| Faceless.so | Faceless videos with narration, visuals, and captions | Free signup to explore the platform | Generation credits and paid-plan requirements |
| Revid.ai | AI-generated short-form content | Free signup with limited trial credits | Credit consumption and generation limits |
| InVideo AI | Prompt-based video creation and editing | Limited free access | Weekly quotas and export restrictions |
| Lumen5 | Turning articles into scene-based videos | Free plan available | Branding and export options |
| Fliki | Narrated videos with AI voices | Free plan with limited credits | Watermarks, video limits, and commercial-use rights |
Important: Free access does not always mean unlimited video generation or watermark-free exports. Features and plan terms can change, so check each provider’s official pricing page before choosing a tool.
Faceless.so — Best for a Faceless Video Workflow
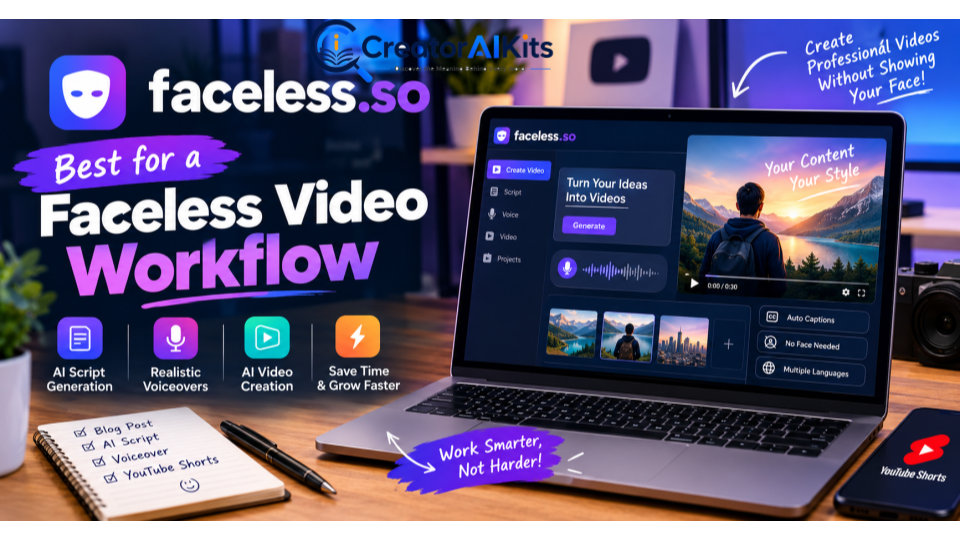
Best for: Bloggers who want to create videos with AI narration and visuals without appearing on camera.
Faceless.so focuses on creating faceless videos using AI-generated scripts, narration, visuals, and captions. It may be a suitable starting point if you want to turn an article’s main ideas into short-form content without building the entire video manually.
One important distinction: a faceless-video generator is not necessarily a complete blog-import tool. Check whether the current workflow accepts your article URL or whether you need to supply a script or idea.
What makes it useful?
- Helps create videos without filming yourself.
- Combines narration and visuals in a single workflow.
- Adds captions to support viewers watching without sound.
- Gives you an editable starting point for a short video.
How to try it
- Visit Faceless.so.
- Explore the available video-creation workflow.
- Prepare a short script based on one key takeaway from your blog post.
- Select a suitable visual style and narration option.
- Review the generated video and edit any inaccurate or irrelevant scenes.
- Check the available credits and export restrictions before paying.
Pros
- Useful for creators building faceless video channels.
- Can combine several production tasks in one workflow.
- Offers a practical starting point for short-form content.
Cons
- Generated visuals may not match every detail of your article.
- Credits can limit how many videos you produce.
- You may need to rewrite long sections into a shorter, more engaging script.
My recommendation: Try it with one short article section first. If the result matches your content style, consider whether the available plan suits your publishing schedule.
Official website: Faceless.so
Revid.ai — Best for Experimenting With AI-Generated Shorts
Best for: Creators who want to turn ideas and supported inputs into short-form videos.
Revid.ai offers AI video-generation tools designed for short-form content. It can help with the early stages of production, including developing a video concept and generating a draft.
However, do not assume that every workflow accepts a complete blog URL. Check the available input options before starting, especially if direct article conversion is your main requirement.
What makes it useful?
- Helps generate short-form video drafts.
- Offers tools for experimenting with different content formats.
- Can reduce some manual scripting and scene-planning work.
- Provides a starting point for educational and informational videos.
How to try it
- Open Revid.ai.
- Choose a video-generation workflow that fits your needs.
- Enter a supported source or provide a concise video idea.
- Review the generated script, narration, and visuals.
- Edit the opening, remove unnecessary sections, and verify the facts.
- Check the current pricing and credit requirements before exporting regularly.
Pros
- Useful for testing different video concepts.
- Can speed up first-draft creation.
- Offers a range of short-form video tools.
Cons
- Free trial credits are limited.
- Generated hooks and narration may sound generic without editing.
- More complex generation options may consume credits quickly.
My recommendation: Use Revid.ai when you want to experiment with different video formats. If your goal is specifically to paste a blog URL and receive a finished Short, confirm that the current workflow supports that process before choosing it.
Official website: Revid.ai
InVideo AI — Best for Building Complete Video Drafts
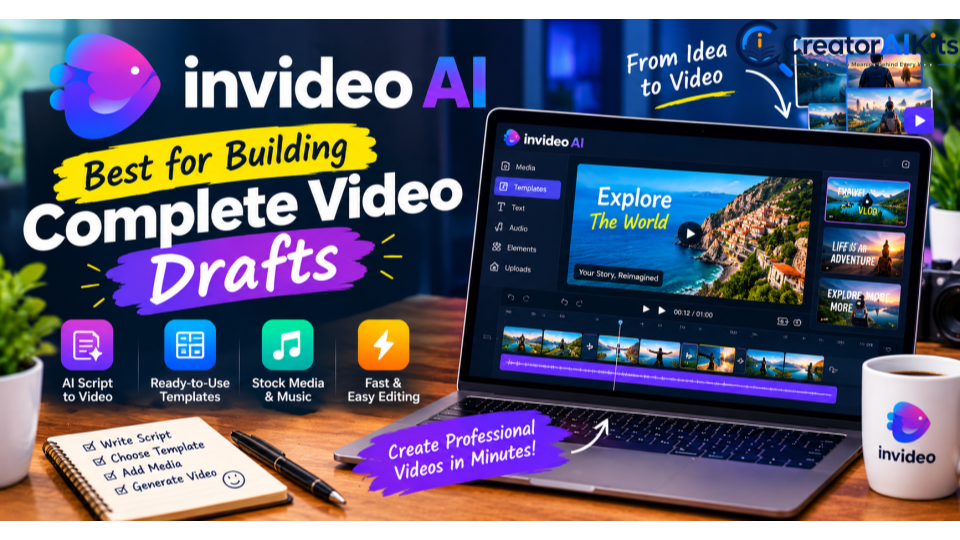
Best for: Creators who want AI assistance with scripts, scenes, narration, and video assembly.
InVideo AI is designed to help users create videos from written prompts and supported inputs. Depending on the workflow, it can combine narration, visual assets, and scenes into a draft that you can refine.
For bloggers, this can be useful when the article needs to become a narrated explainer rather than a simple sequence of text slides.
What makes it useful?
- Helps assemble video drafts from prompts or supported written content.
- Combines narration, visuals, and scenes.
- Offers editing options for refining generated videos.
- Can help structure an explainer around a specific topic.
How to try it
- Visit InVideo AI.
- Open the relevant AI video-creation workflow.
- Enter a concise script or article URL if the selected workflow supports it.
- Specify a vertical format suitable for YouTube Shorts.
- Review the generated scenes, narration, and captions.
- Replace unsuitable footage and check the export settings.
Pros
- Useful for assembling more complete video drafts.
- Can reduce repetitive production work.
- Provides opportunities to refine the generated output.
Cons
- Free access has limits, and export restrictions may apply.
- Some generated visuals may not accurately represent the topic.
- Reviewing and replacing scenes can still take time.
My recommendation: Consider InVideo AI when you want a more complete video draft with multiple scenes. Before committing, create a short test and check the current weekly allowance and export terms.
Official website: InVideo AI
Lumen5 — Best for Turning Articles Into Visual Scenes
Best for: Bloggers who prefer a structured, scene-by-scene video format.
Lumen5 is designed to transform written material into videos. Its workflow can use article content, scripts, or other supported inputs to build a visual sequence that you can review and customize.
This approach can work well for educational content because it encourages you to break a long article into smaller, understandable sections.
What makes it useful?
- Helps organize written information into visual scenes.
- Provides a storyboard-style approach to video creation.
- Supports content repurposing for explainers and presentations.
- Offers branding and customization features according to the plan.
How to try it
- Visit Lumen5.
- Choose the appropriate article-to-video or text-to-video workflow.
- Supply your article URL or text where supported.
- Review the selected highlights and scene sequence.
- Replace irrelevant visuals and shorten sections that feel too wordy.
- Check the free plan’s branding and export options.
Pros
- Useful for turning structured writing into a visual sequence.
- Helps organize key points into scenes.
- Can suit tutorials and educational explainers.
Cons
- Automatic scene selection may miss an important point.
- Free videos may include Lumen5 branding.
- Poor pacing can make the finished video feel like a slideshow.
My recommendation: Try Lumen5 when your article already has clear sections and a logical flow. For YouTube Shorts, keep only the most useful points rather than converting every paragraph into a separate scene.
Official website: Lumen5
Fliki — Best for AI Narration and Visuals
Best for: Creators who want narrated videos without recording their own voice.
Fliki combines text-to-video and text-to-speech features. It can help turn scripts and supported written content into narrated videos with visuals.
For a blogger, this can be useful when the content depends on explaining a process, summarizing a concept, or guiding viewers through a series of steps.
What makes it useful?
- Provides AI voices for narration.
- Can pair written scripts with visual assets.
- Supports educational and informational video formats.
- Offers different voice and language options.
How to try it
- Open Fliki.
- Choose a suitable text-to-video workflow.
- Enter your script or another supported input.
- Select a voice and review the generated scenes.
- Listen carefully for pronunciation mistakes.
- Check the remaining credits, watermark restrictions, and usage rights before exporting.
Pros
- Useful when narration is central to the video.
- Can reduce the need to record voiceovers.
- Offers options for creating multilingual content.
Cons
- The free plan has limited credits.
- AI voices may mispronounce names or technical terms.
- Visuals may require manual replacement.
My recommendation: Test the voice with a short paragraph containing the terminology used in your niche. A natural-sounding voice and accurate pronunciation can make a bigger difference than adding unnecessary visual effects.
Official website: Fliki
How to Choose the Right AI Video Tool for Your Blog
The right tool depends on what you already have and what you want to publish. A long article, a short script, and a tutorial with software screenshots may require different workflows.
Use these questions to narrow your options:
- Have a published blog URL? Start with a tool that explicitly supports article URLs.
- Have copied text or a short script? Look for a compatible text-to-video workflow.
- Want a narrated explainer? Prioritize voice quality, captions, and scene editing.
- Want to publish regularly? Check monthly credits, export limits, and watermarks.
- Need accurate software demonstrations? Choose a workflow that allows you to add your own screen recordings.
- Plan to monetize your videos? Review the tool’s commercial-use terms and YouTube’s content policies.
The best tool is not necessarily the one with the most features. It is the one that helps you create useful videos consistently without adding unnecessary cost or editing work.
Step-by-Step: Turn One Blog Post Into a YouTube Short
You do not need to turn every sentence of your article into a video. A Short usually works better when it focuses on one useful idea and explains it clearly.
Step 1: Choose One Useful Takeaway
Start by identifying the most helpful question your article answers.
For example, if your blog post covers AI writing tools, you could create a Short explaining one common writing problem and showing a practical way to solve it.
Avoid trying to summarize a 2,000-word article in 30 seconds. Choose one takeaway that viewers can understand without reading the entire article.
Step 2: Write a Short, Original Script
Use a simple three-part structure:
- Hook: Give viewers a clear reason to keep watching.
- Value: Explain one useful idea or demonstrate a process.
- Takeaway: Tell viewers what they can try next.
Example script:
“Already have a blog post? You may have the starting point for your next YouTube Short. Pick one practical tip, rewrite it into a short script, add relevant visuals and captions, and review the final video before publishing. One useful article can give you several ideas for future videos.”
This is a sample script, not a guarantee that repurposed content will attract views.
Step 3: Generate the First Draft
Paste your script into a tool that supports your chosen input format. Select a vertical-video workflow and generate the first version.
Treat the result as a draft rather than a finished product. Check whether the video explains your idea clearly and whether the opening gets to the point quickly.
Step 4: Replace Generic Visuals
Review every scene. If your video explains a software feature, consider using an accurate screen recording or product screenshot.
For example, a video explaining how to use an AI writing tool will usually benefit more from a relevant demonstration than from unrelated stock footage of someone typing on a laptop.
Step 5: Improve Captions and Narration
Check spelling, timing, pronunciation, and readability.
Keep captions easy to read on a mobile screen. Make sure important text is not hidden behind YouTube’s interface, and adjust the narration if it sounds unnatural or moves too quickly.
Step 6: Export and Review the Final Video
Before publishing, confirm that:
- The video uses a suitable vertical or square format.
- The opening clearly communicates the topic.
- Captions match the narration.
- Visuals support the information being explained.
- Factual claims are accurate.
- Music, footage, and other assets are licensed for your intended use.
- The export complies with your tool’s plan restrictions.
YouTube supports eligible Shorts up to three minutes long, but a shorter video may be more effective for a single, simple takeaway. Check the official YouTube Shorts guidance for current requirements.
Step 7: Publish and Learn From the Results
Write a relevant title and description. If appropriate, direct viewers to the full article for more detailed information.
After publishing, review YouTube Analytics to understand audience retention and engagement. Use those observations to improve your next video instead of assuming that AI-generated content will automatically perform well.
The Free Blog-to-Short Workflow I Recommend
If you are new to video repurposing, you do not need five subscriptions to get started.
Follow this simple workflow:
- Choose one existing blog post.
- Identify one useful takeaway.
- Write a short script with an original opening.
- Test one suitable free plan or preview.
- Review the narration, visuals, and captions.
- Check the export limits and usage rights.
- Publish the video and evaluate the audience response.
Start with one tool and one video. If the process works for your content, you can repeat it and explore other tools only when they solve a specific problem.
Common Mistakes to Avoid
Pasting the entire article without editing: Blog posts and Shorts have different pacing. Focus on one idea instead of squeezing every paragraph into a short video.
Using generic AI hooks: An opening should connect directly to the viewer’s problem. Avoid exaggerated promises that the video cannot deliver.
Trusting every generated scene: AI may select footage that looks attractive but does not explain the topic. Review the visuals individually.
Ignoring free-plan restrictions: Free access does not automatically include unlimited exports, watermark-free videos, or unrestricted commercial use.
Publishing repetitive videos at scale: Add original explanations, examples, demonstrations, and editorial judgment. YouTube’s monetization policies emphasize original, authentic content rather than mass-produced, repetitive videos.
Ignoring copyright and disclosure requirements: Use assets you own or have permission to use. YouTube also requires disclosure for certain realistic AI-generated or meaningfully altered content. Check the official AI disclosure guidance.
Expecting instant website traffic: Videos can introduce your content to new viewers, but traffic is not guaranteed. Make your call to action relevant and evaluate actual results.
Frequently Asked Questions
1. Can I turn a blog post into a YouTube Short for free?
Yes, you can test some tools through free plans, previews, or limited credits. However, video generation, downloads, resolution, and branding may be restricted. Check the current plan details before starting.
2. Which AI tool is best for turning blog posts into YouTube Shorts?
It depends on your workflow. Faceless.so is worth exploring for faceless video creation, Revid.ai for short-form generation, InVideo AI for broader video assembly, Lumen5 for scene-based article videos, and Fliki for narrated content. Test your actual script before choosing a paid plan.
3. Do I need video-editing experience?
No advanced editing experience is necessary to create a first draft with these tools. However, reviewing the script, captions, visuals, and pacing is important if you want a useful final video.
4. Can AI convert a blog URL directly into a video?
Some tools offer URL-based workflows, while others require pasted text or a script. Check the selected tool’s current capabilities. If URL import is unavailable, extract the relevant section of your article and use a supported input format.
5. How long should a YouTube Short be?
Eligible YouTube Shorts can be up to three minutes long. That does not mean every Short should use the full duration. For a single practical tip, a shorter video may communicate the idea more effectively. Review YouTube’s current format requirements before publishing.
6. Can I monetize AI-generated YouTube Shorts?
AI assistance does not automatically make a video eligible or ineligible for monetization. Your content must meet YouTube’s policies, including its requirements for originality and authentic value. Repetitive, mass-produced, or minimally transformed content can create monetization problems.
Read the official YouTube monetization policies.
7. Do I need to disclose AI-generated content?
Disclosure depends on how AI is used. YouTube requires creators to disclose certain realistic altered or synthetic content, such as realistic scenes that did not happen or content that makes a real person appear to do something they did not do. Ordinary production assistance, such as using AI to draft a script, does not automatically require disclosure.
Review the official disclosure requirements.
8. Can I use copyrighted images or music in AI-generated videos?
AI-generated output is not automatically copyright-safe. Use content you created, content licensed for your intended use, or material you have permission to use. Also check the terms for stock footage, music, and other assets supplied by your video tool.
9. Will turning blog posts into Shorts increase website traffic?
It can create another way for people to discover your content, but more traffic is not guaranteed. Link to the original article where appropriate, use a relevant call to action, and review actual clicks and engagement.
10. Should I publish an AI-generated video without editing it?
It is better to review the video first. Correct factual errors, remove irrelevant scenes, improve the opening, and make sure the video offers meaningful value beyond an automated summary.
Pro Tip: Turn One Blog Post Into Multiple Videos
Don’t stop at creating just one YouTube Short. Repurpose different sections of your blog post into separate short videos, each focused on one useful tip, question, or key takeaway. Add captions, review the AI-generated visuals, and customize the opening hook to keep viewers interested. For more ideas, explore our guide to How to Make AI Videos in 2026 to learn how AI video tools can help simplify your content creation workflow.
Final Verdict: Start With One Blog Post
You do not need to create every video from scratch. An existing blog post can provide a useful starting point for a YouTube Short when you reshape it for a visual, fast-moving format.
Choose one suitable tool, check its free limits, and create a video around a specific takeaway. Review the output carefully, publish it, and use audience feedback to decide what to improve next.
The goal is not simply to produce more videos. It is to turn useful written content into videos that people genuinely want to watch.
Editorial note: AI tool features, free plans, and platform policies can change. Verify current official terms before publication and revisit this guide when the relevant features or restrictions change.

Welcome to CreatorAIKits! I’m passionate about learning and exploring AI tools, creativity, and technology.
I’m continuously researching and gaining hands-on experience with different AI tools and technologies.
My goal is to share simple, useful, and practical AI information for beginners and everyday users.
Thanks for visiting CreatorAIKits!